
I started hiking at 18, which felt a little late to the party. Those first few years, I made every mistake in the book. I camped on a glacier in a bag rated for cool summer nights, wore secondhand shoes that had seen better decades, and told myself real hikers didn’t need “luxury” gear. If I wasn’t shivering, blistered, or soaked through, was I even outdoors?
Twelve-plus years and thousands of kilometres later, across the Karakorams, Himalayas, Caucasus, Rockies, Andes, and Alps, I’ve learned comfort and minimalism aren’t opposites. Suffering for the sake of “authenticity” doesn’t make a hike more meaningful. It just makes it miserable.
This is my complete ultralight backpacking gear list, including honest alternatives where my pick isn’t the only right one. Skim to what you need, or read start to finish. Either way, skip the rookie mistakes I made and head out with gear that actually works.
🤿 Quick note before you dive in: this list assumes multi-day backpacking, where every ounce is on your back for days at a time. If you’re canoe camping or on a lower-mileage trip where the boat (or the car) does the carrying, weight rules loosen a lot. There’s a dedicated section near the end for exactly that.
The Big Three
You’ll hear “the Big Three” in almost every ultralight guide: your backpack, your shelter, and your sleep system. These are the heaviest things you own and the ones worth real research before you buy, since getting them right changes everything else about the trip.
I’m counting the sleeping pad as part of the sleep system, not its own separate category. A warm bag on cold ground still leaves you cold, so the bag and pad work as a pair.
Most gear lists start with the backpack. Mine doesn’t, and here’s why: a bad backpack makes you uncomfortable, but a bad sleeping system can genuinely put you in danger. Hypothermia doesn’t need a blizzard to set in, it can happen at temperatures as mild as 10°C (50°F) if you’re wet, windy, or exhausted. Something I had to find out about the hard in Newfoundland.
So we’re starting with the sleeping bag, then the tent, then the pack. None of this needs to cost a fortune or weigh down your pack. Ultralight just means being intentional about where the weight actually goes.
Sleeping Bag & Quilt
Both Dani and I carry the Nemo Riff 15, rated to -9°C (15°F). Same model, different fill. His is about half a pound lighter than mine, because Nemo actually tests for real comfort levels instead of assuming everyone sleeps the same, and men generally run warmer. On the warmest Ontario nights, I just unzip mine a bit instead of overheating.
For milder trips, I’ve also used the Nemo Coda, which is built for warmer nights and packs down smaller since it’s not carrying the same amount of insulation. If most of your trips stay well above freezing, it’s worth a look before you spend more on a colder rating you’ll never actually need.
I didn’t always get this right. On a trip to Khaltaro Valley, Pakistan, I borrowed a sleeping bag that wasn’t warm enough for the nights we hit and spent two nights doing that shivering half-sleep where you’re technically unconscious but also counting the hours until sunrise. Never again.
Sleeping Pad
Ground steals heat faster than you’d think, that’s the whole reason a sleeping pad exists, not just cushioning. Insulation is measured in R-value: the higher the number, the warmer the pad. For most three-season trips, something in the R 2 to R 4 range is enough, winter camping needs more. REI’s breakdown is a good plain-language explainer if you want the full range.
There are really just two options worth considering:
- Closed-cell foam: foam pads are cheap, nearly indestructible, and can’t puncture, but they’re bulky and usually get strapped to the outside of your pack.
- Air-inflatable: pack down small and feel more like an actual mattress, but they can leak, and a cheap one failing on night two of a five-day trip is a genuinely bad time.
I went without a pad entirely for years (don’t do this), then picked up a budget pad off Amazon. Nothing fancy, but compared to sleeping directly on the ground, it’s a massive upgrade.
If you want the lightest pad that packs down smallest, look at the Therm-a-Rest NeoAir XLite NXT. If warmth-to-weight ratio matters most, it’s the NEMO Tensor Extreme Conditions. And if you’re willing to give up an ounce or two for genuine comfort, the Sea to Summit Ether Light XR Insulated is great!
Pillow is optional. I usually just ball up a hoodie under my head. Dani disagrees, he travels with a Trekology inflatable pillow and has been trying to recruit me to “the pillow club” for years. I’m not there yet.
Backpack
My current pack is the Gregory Maven 48L, a recent upgrade after years of carrying whatever secondhand gear I could get my hands on. I almost went with the Osprey Aura, which was genuinely comfortable too, but the Maven’s fit won me over.
One thing you’ll notice with most ultralight packs (including the Maven) is that they don’t come with endless compartments. It’s not laziness on the part of the designers – it’s intentional. Extra zippers and dividers add weight, complicate the structure, and can interfere with how well the pack transfers weight to your hips. Fewer compartments = less shifting, more stability, and fewer failure points.
The Maven’s 48L size works well for me: big enough for multi-day hikes but small enough to keep me disciplined about what I carry. My partner carries a 60L, which definitely fits more, but I find 48L hits the sweet spot for comfort without bulk.
One thing you’ll notice with most ultralight packs, the Maven included, is that they skip the endless compartments. Extra zippers and dividers add weight and give the pack more places to shift around on your hips while you’re hiking. Fewer compartments means a steadier carry, even if it means being a bit more organized about what goes where.
48L is the sweet spot for me, big enough for a multi-day trip, small enough to keep me honest about what I actually pack. Dani carries a 60L, which fits more, but I’d rather stay disciplined than let the extra room tempt me into overpacking.
Con: mine, bought through MEC, didn’t come with a rain cover. Worth flagging since some Gregory listings suggest certain versions include one tucked in a pocket under the lid. I use this rain cover from Amazon.
Tent
Our current shelter is the Nemo Hornet OSMO Ultralight 2P, and it’s been a genuine upgrade. At 2 lbs (950g) and packing down to 12.5 x 7.5 x 3.5 in, weight and pack size were the whole reason we went for it. Every ounce counts when you’re carrying your home on your back.
We’ve used it on many multi day hikes in Canada, on canoe trips through Algonquin and Killarney, and a weekend on Manitoulin Island. It’s held up through heavy rain and wind without issue. On one especially dewy morning we did wake up with condensation inside, but that’s more about humid conditions and pitch angle than a flaw in the tent itself. Ventilation and how tightly you pitch it matter more than people expect with ultralight shelters.
It’s not the cheapest tent out there, but for the balance of weight, comfort, and durability, I’ve been genuinely happy with it.
The Big Three
Category Subtotal| Item | Weight | Price |
|---|---|---|
| Sleeping Bag Nemo Riff 15 (Women’s) |
2 lb 15 oz | $400 |
| Sleeping Pad Sea to Summit Ether Light XR Insulated |
16.6 oz | $199 |
| Backpack Gregory Maven 48L |
3 lb 2 oz | $280 |
| Tent Nemo Hornet OSMO Ultralight 2P |
2 lb 1 oz | $600 |
| Big Three Subtotal | ~9 lb 3 oz | $1,480 |
Clothing & Footwear
Clothing is usually the second-heaviest part of anyone’s base weight after the Big Three, and it’s where beginners overpack the most. This section opens with the system I actually use to decide what goes in the bag, then gets into the specific pieces.
Packing Formula for Clothes
Here’s the formula I use every time. Adjust the days, keep the ratio:
- Underwear: 1 per day
- Socks: 1 per day, plus 1 spare pair in case things get wet
- Shirts: 1 per 2 days, you’ll re-wear them, that’s fine
- Bottoms: 1 for the whole trip, unless it’s genuinely muddy or wet
- Sleep clothes: 1 set, kept clean and dry no matter what
- Insulation layer: 1, regardless of trip length
- Rain gear: always 1 jacket, rain pants are optional
Shoes + Socks
Hiking Boots: Once something works, I stick with it. My Lowa Renegade boots lasted from age 18 until last year, through 30+ countries, before finally wearing out. I bought the exact same pair again, just a different colour. Boots are personal: try a few on and trust what fits your feet.
Trail Sandals: When I want something lighter, I reach for my Teva sandals. Five years in, through Patagonia hikes, city streets, and canoeing, they’ve held up completely. With flat feet and few options beyond sneakers, they’ve genuinely changed what’s comfortable for me.
Socks: Merino over cotton, no contest, it breathes better and dries faster. I wear Darn Tough hiking socks, and the real selling point is the lifetime guarantee: wear a hole in them and they replace the pair free, no receipt needed since they knit their name right into the sock.
Clothing System (Layers)
- Base layer: Uniqlo HeatTech. Packs light, keeps me warm without bulk, this is the layer against your skin, so avoid cotton here above all else.
- Insulation layer: Haven’t landed on a favourite puffy yet, this section gets filled in once I do.
- Rain shell: [Patagonia Torrentshell 3L](affiliate link pending). Held up through a proper thunderstorm on the Berg Lake Trail at Mount Robson without a single leak.
- Rain pants: A budget pair that’s worked fine so far, worth it if your trip is likely to be genuinely wet.
- Camp clothes: One clean outfit to change into after hiking, nothing more.
- Underwear & socks: Rotate based on the packing formula above.
Cooking & Food
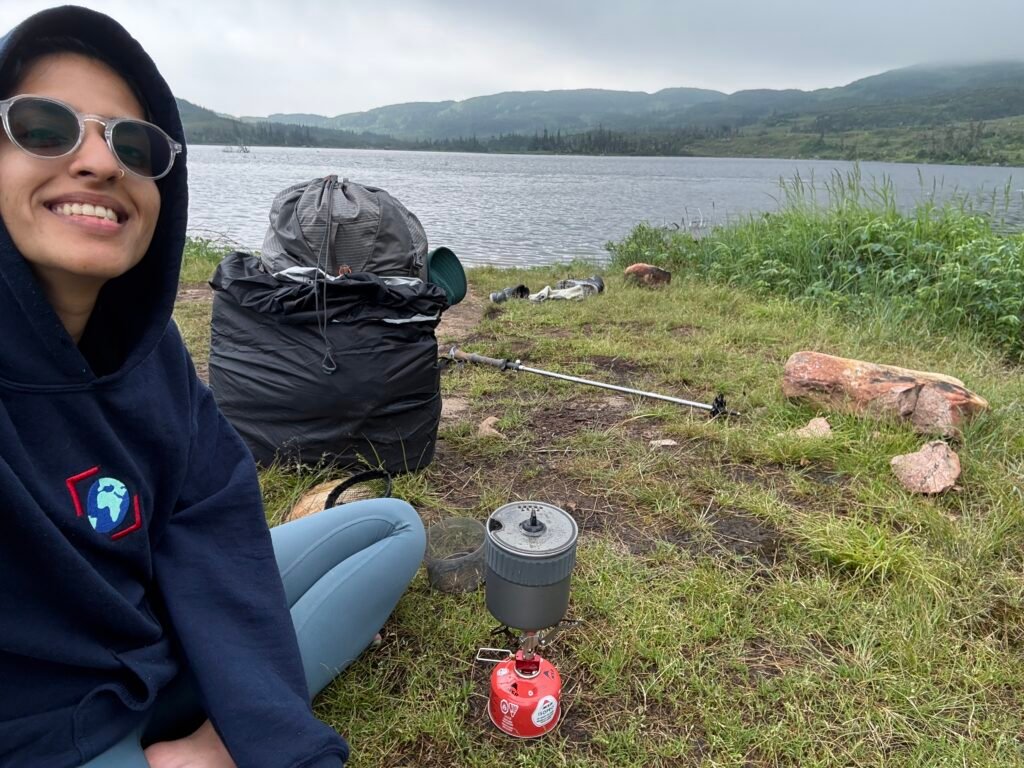
Stove & Fuel: MSR PocketRocket 2. Fits in your palm, weighs next to nothing, boils a litre of water in about 3.5 minutes. Plenty for two people and pretty much all you need out there.
Cookware: One pot, one spork. I use a cheap collapsible mug and a set of sporks from Amazon, nothing fancy, just light and functional. Collapsible pots and kettles exist if you want to get into it, but one pot and one spork covers everything.
Meals: Mostly dehydrated meals, REI in the US, MEC in Canada. My go-to is Mountain House lasagna. It’s technically two servings. I eat the whole thing myself, and I’m a small person.
Fire Starting: A lighter, plus a backup, waterproof matches or a small ferro rod.
Food Storage: Essential in bear country. I use a bear bag setup, light and easy to hang. Outside bear country, don’t overthink it, ziplocks or a dry bag are fine.
Water & Filtration
Water bottle: I used Nalgene 32 oz. It’s light weight and can be used for cold water + hot water.
Personal Filter: Both Dani and I carry a LifeStraw. Lightweight, dead simple, one of the most reliable things we own. Only real downside: you have to suck harder than you’d like to pull the water through.
Gravity System: Worth the upgrade for groups. When we’re camping with more people, we switch to a gravity filter. Hang it on a tree, everyone fills up as needed. Far more efficient than passing a straw around.
Backup Purification: Even with a filter, carry a backup. Tablets or drops weigh almost nothing and can save a trip if your filter fails or clogs.
Navigation & Tools
Maps & Apps: I use AllTrails for most trips. The free version worked fine for years, now we pay for the subscription mainly for offline maps, which is a lifesaver once you’re out of cell service. If you hike often in remote areas, it’s worth it, if not, stick with free.
GPS Beacon: One item I don’t own yet but genuinely want is the Garmin InReach. It’s expensive, but satellite messaging and an SOS button are hard to argue with on remote, high-altitude trips where cell service simply doesn’t exist.
Knife/Multitool: My brother gave me a Swiss Army knife about 10 years ago, and it’s one of the most “paisa wasool” (worth every penny) items I own. The wood saw alone has been useful for everything from a trekking pole substitute to campsite repairs.
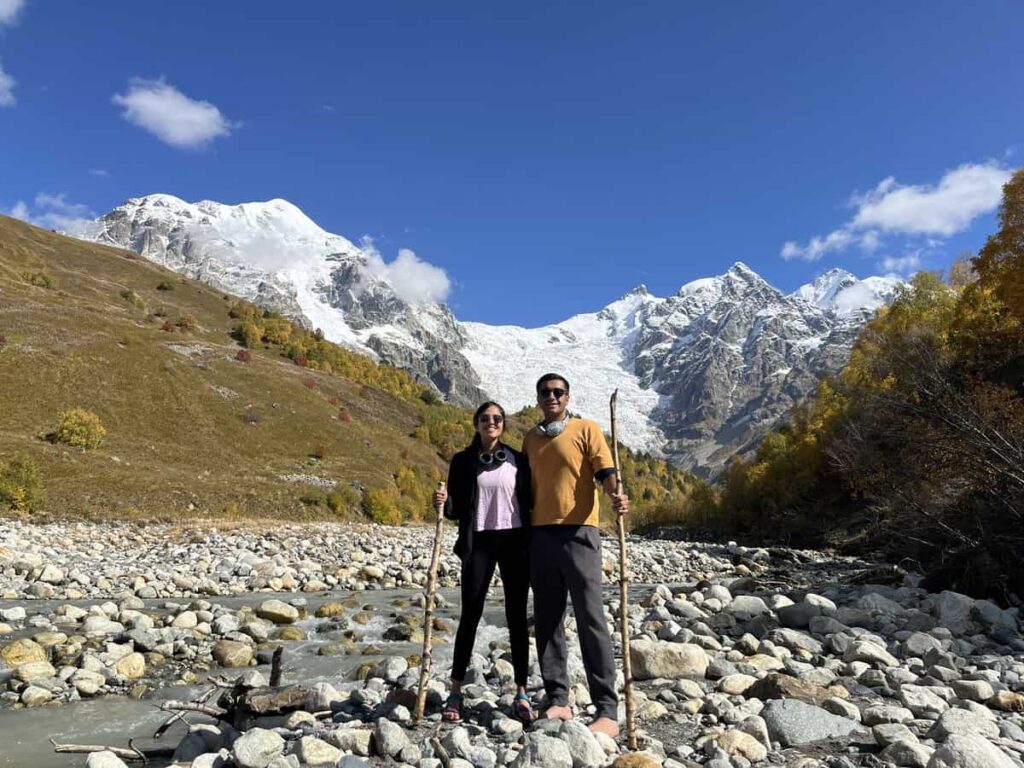
Trekking Poles: For years I didn’t own poles and just used branches I’d find on the trail, like on the Mestia to Ushguli hike in Georgia. Now I use Trekology foldable poles. I don’t carry them on every hike, but on steep or long days, they save my knees.
Permits & Passes: Always check permit requirements before you go, and carry a copy, digital or printed. Same goes for any parking pass the trailhead requires.
Toiletries and First Aid
Toiletries: Toothbrush (snap the handle in half, you don’t need the whole thing), toothpaste, toilet paper plus a small trowel for catholes where allowed, hand sanitizer, wipes, and menstrual supplies if you need them. I recently started using Kula cloth and personally, I’m really enjoying it. I understand that it’s not for everyone.
First Aid Kit: We DIY ours, tailored to the trip. Band-aids, blister patches, painkillers, and antiseptic are always in there. Pre-packaged kits work fine too if you’d rather not assemble your own.
Bug Protection & Sunscreen: Bug spray is non-negotiable on most hikes. A head net helps if you’re especially prone to bites, though I don’t use one often.
Tech & Power
Headlamp: Any headlamp works, but I upgraded to one with a red-light mode. It’s easier on the eyes while stargazing, softer for whoever’s sharing a tent with you, and lightweight with multiple brightness settings. The motion sensor is genuinely useful, wave your hand instead of fumbling for buttons in the dark.
Power Bank: If your phone is your navigation tool, a power bank isn’t optional. Mine’s a 10,000mAh Anker charger, slim enough to carry daily and versatile enough to charge my phone, camera, and AirPods. It also doubles as a detachable 5,000mAh bank, a wireless charging pad, and a stand. Downsides: charging is slower than wired, and non-MagSafe cases weaken the grip.
Miscellaneous Essentials
Ground Sheet: A packable picnic blanket, folds down to the size of my hand. I’ve used it as a ground sheet on wet hikes, a picnic mat on beaches, and once as an emergency rain cover during a thunderstorm.
Entertainment: I never travel without my Kindle, picked up years ago when I lived in Budapest and got tired of hunting for English books. Lightweight, endless battery, a library in your pocket. Beyond that, a deck of cards, a journal, or a sketchpad for long evenings at camp.
Dry Bags & Packing Cubes: Packing cubes keep clothes and small essentials findable, even inside a chaotic backpack. For water-heavy trips, add a dry bag, I used a dry bag fanny pack on a recent canoe trip for my phone and snacks, perfect for quick access.
Ziploc Bags: Multi-use for trash, and cheap waterproofing for your phone in a pinch. Costs nothing, weighs nothing.
When Weight Isn’t as Tight: Canoe Camping & Low-Mileage Extras
Everything above assumes every ounce is on your back for days. Canoe camping, or any trip where the boat (or the car) carries the weight, changes the math. Here’s what I’d actually add.
Camp Chair: Worth it the second you’re not carrying it on your back. Ours packs into the canoe without a second thought.
Hammock: Just 500g and genuinely sturdy, it’s been through Algonquin with me four times. On a canoe trip, there’s zero reason to skip it.
Coffee Setup: On a hike, it’s instant coffee or nothing. On a canoe trip, I’d bring an AeroPress Go with a reusable metal filter (skips the paper filters and the waste) and reuse the collapsible mug from the cook kit above
Ultralight Backpacking Gear List
Total Pack Weight
Item name links to product| Item | Status | Imperial | Metric |
|---|---|---|---|
| The Big Three | |||
| Sleeping Bag, Nemo Riff 15 | Essential | 2 lb 15 oz | 1.34 kg |
| Sleeping Pad, budget inflatable | Essential | 1 lb 0 oz | 0.45 kg |
| Tent, Nemo Hornet OSMO 2P | Essential | 2 lb 1 oz | 0.94 kg |
| Backpack, Gregory Maven 48L | Essential | 3 lb 2 oz | 1.42 kg |
| Category Subtotal | 9 lb 2 oz | 4.14 kg | |
| Clothing & Footwear | |||
| Hiking Boots, Lowa Renegade | Essential | 2 lb 2 oz | 0.96 kg |
| Socks, Darn Tough | Essential | 2.5 oz | 71 g |
| Base Layer, Uniqlo HeatTech | Essential | 6 oz | 170 g |
| Insulation Layer (still testing) | Essential | 13 oz | 369 g |
| Rain Jacket, Patagonia Torrentshell 3L | Essential | 12.4 oz | 352 g |
| Rain Pants, budget pair | Optional | 5.5 oz | 156 g |
| Category Subtotal | 4 lb 9 oz | 2.08 kg | |
| Cooking & Food | |||
| Stove, MSR PocketRocket 2 | Essential | 2.6 oz | 74 g |
| Cook Kit, mug + sporks | Essential | 3 oz | 85 g |
| Food Storage, bear bag | Essential | 3 oz | 85 g |
| Fire Starting, lighter + backup | Essential | 0.5 oz | 14 g |
| Food, dehydrated (~2 days) | Essential | 2 lb 0 oz | 0.91 kg |
| Category Subtotal | 2 lb 9 oz | 1.16 kg | |
| Water & Filtration | |||
| Filter, LifeStraw | Essential | 2 oz | 57 g |
| Purification Tablets | Optional | 1 oz | 28 g |
| Water Bottle, Nalgene 32oz | Essential | 6.25 oz | 177 g |
| Category Subtotal | 9.3 oz | 262 g | |
| Navigation & Tools | |||
| Multitool, Swiss Army Classic | Essential | 0.74 oz | 21 g |
| Trekking Poles, Trekology | Optional | 15 oz | 425 g |
| Category Subtotal | 15.7 oz | 446 g | |
| Health & Hygiene | |||
| Toothbrush, cut in half | Essential | 0.3 oz | 8 g |
| Toothpaste, travel size | Essential | 1 oz | 28 g |
| Toilet Paper + Trowel | Essential | 1.5 oz | 42 g |
| Hand Sanitizer | Essential | 1 oz | 28 g |
| First Aid Kit | Essential | 2 oz | 57 g |
| Bug Spray, travel size | Essential | 2 oz | 57 g |
| Sunscreen, travel size | Essential | 1 oz | 28 g |
| Kula Cloth | Optional | 1 oz | 28 g |
| Category Subtotal | 9.8 oz | 278 g | |
| Tech & Power | |||
| Headlamp | Essential | 2.2 oz | 62 g |
| Power Bank, 10,000mAh Anker | Essential | 9 oz | 255 g |
| Category Subtotal | 11.2 oz | 318 g | |
| Miscellaneous | |||
| Ground Sheet / Picnic Blanket | Optional | 3 oz | 85 g |
| Kindle | Optional | 5.6 oz | 158 g |
| Packing Cubes | Optional | 3 oz | 85 g |
| Dry Bag Fanny Pack | Optional | 4 oz | 113 g |
| Ziploc Bags | Essential | 0.1 oz | 3 g |
| Trash Bags | Essential | 1 oz | 28 g |
| Category Subtotal | 16.7 oz | 473 g | |
| Grand Total | 20 lb 3 oz | 9.16 kg | |
