While most people come to Ushuaia dreaming of Antarctic cruises and penguin selfies, I was a few thousand dollars short and already sunburned from hiking my way through southern Patagonia. What I needed wasn’t a luxury cabin or a captain’s dinner, it was a trail. Something raw, quiet, and reasonably free.
That’s how I ended up on the Laguna del Caminante hike.
This two-day trek through Tierra del Fuego delivers everything I love about Patagonia: glacier-fed valleys, boggy forests, wind-slapped mountain passes, and a campsite that feels like it dropped out of a postcard. It’s not Ushuaia’s most famous trail – Laguna Esmeralda and Vinciguerra Glacier usually get that crown – but it might be its most satisfying one.
If you’re looking for a hike that feels truly off-grid (but still within range of a post-trek beer), here’s what you need to know. I’ll walk you through the route options, how to prep, why the ice cave is worth the detour, and what I wish I knew before sinking knee-deep into Tierra del Fuego mud.
Not a hardcore hiker? No worries – there are still plenty of other things to do in Ushuaia beyond hitting the trails.
Choosing Your Route: Andorra Valley or Cañadón de la Oveja?
There are two ways to tackle the Laguna del Caminante hike – and the direction you choose shapes your whole experience. Here’s what to know before you commit.
Option 1: Start in Andorra Valley, end in Cañadón de la Oveja
This is the more common route for locals, mostly because it starts closer to town. It’s also the default route shown on AllTrails if you search for “Laguna del Caminante,” which is something to keep in mind when downloading maps.
Here’s how to get there:
- From Ushuaia, take National Route 3 north toward Río Grande.
- After about 4 km, turn left (north) onto a dirt road into Andorra Valley, a semi-residential area with farms, greenhouses, and scattered homes.
- Follow the road for another 4 km until it dead-ends at a metal gate marking private land. This is where the hike begins.
- GPS Coordinates: -54.764160, -68.300970
You can drive or take a taxi all the way to the gate. Most drivers in town know the spot, and the road is unpaved but manageable. Expect to pay around $10–15 USD one way by taxi, depending on your starting point.Heads up: this route finishes far outside Ushuaia. If you don’t pre-arrange a ride from the end point at Cañadón, you could be stuck waiting a while for a lift.
OOption 2: Start in Cañadón de la Oveja, end in Andorra Valley (Recommended)
This was the route I took and I’d 100% do it again.
- From downtown Ushuaia, head southwest out of town and drive 30 km to the trailhead.
- GPS Coordinates: -54.823520, -68.392010
Starting here means you climb the steepest, most exposed section on Day 1 (when you’re fresh), then enjoy a more relaxed descent through forests and valleys on Day 2. You’ll also finish near civilization – and even better, near a local bar where you can grab a drink and ask them to call you a taxi back to town.Note on transport: No public transport serves either trailhead, so you’ll need to pre-book your taxi. Drivers are used to this route, and many will agree to pick you up at a set time the next day if you ask in advance.
Note: There’s no public transport to either trailhead, so you’ll need to arrange a taxi drop-off. Drivers in Ushuaia are familiar with both start points, and you can pre-schedule a ride for pickup or drop-off.

What To Expect On The Laguna de Caminanta Hike
This isn’t a quick stroll to a lookout point. It’s a proper 22 km point-to-point trek with 1400m of elevation gain, changing terrain, and real wilderness vibes. That said – if you’ve done a few day hikes and are comfortable carrying a pack, you’re more than ready.
The trail is well-marked throughout, with painted posts and cairns guiding you through forests, over mountain passes, and across streams. Still, don’t rely on cell service – it cuts out early. Download the route on AllTrails or Maps.me before you go. I used AllTrails, and they were spot on.
Here’s how the hike unfolds, based on the more scenic Cañadón to Andorra route.
Day 1: Valleys, Glaciers, and Wind-Slammed Passes
The trek starts with a steady climb through the forested Cañadón de la Oveja valley. The early trail is lush, filled with wildflowers in summer, and offers plenty of places to rest. It’s a calming start – until you break the treeline.
Once you hit the glacier, things get dramatic. Snow-capped ridgelines loom above you, and the trail turns rocky and exposed. From here, you’ll climb steeply toward the mountain pass. This was the toughest section for me – not just the incline, but the wind trying to throw me off balance with every step.
About two hours before camp, there’s a detour to a hidden ice cave on the left-hand side of the trail. It adds about 3 km round-trip but is absolutely worth it. Imagine walking into a shimmering tunnel carved by glacier melt, tucked beneath the cliffs of Tierra del Fuego – eerie, beautiful, and freezing.
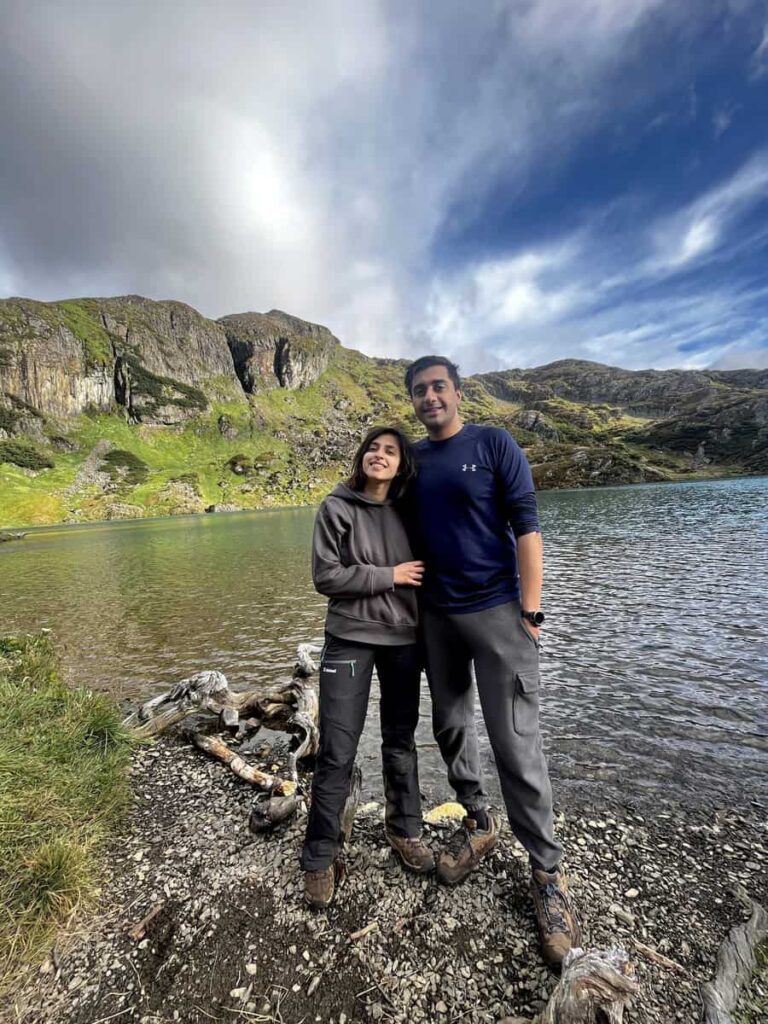
As you crest the pass, the landscape shifts again. The views open up into alpine meadows, and soon enough, Laguna del Caminante appears – quiet, surreal, and ringed by jagged peaks.
If you’re planning to camp, this is where you’ll spend the night. I followed my usual lightweight packing setup and it was more than enough for this route.
Day 2: Mud, Forests, and the Long Walk Out
The next morning starts with a short climb, then a long, often-muddy descent through the Andorra Valley. This part is physically easier but messier – think peat bogs, slick roots, and some stream crossings. It’s also quieter, and the dense lenga forests feel like a different planet from the alpine pass you just crossed.
You’ll eventually emerge near the Andorra trailhead, where you can catch a taxi back to Ushuaia (or grab a drink at the nearby bar while you wait).

Logistics: What You Need to Know Before You Go
This trail isn’t technically hard to plan, but there are a few details you’ll want sorted before heading out especially if you’re not used to hiking this remote.
When to Go
The best window is November through April, when the snow has mostly melted and the days are long enough to move at a chill pace. Expect mud year-round, and bring layers – even in January, I saw sun, wind, and flurries all in one afternoon.
Trail Registration (Required)
You’ll need to register your hike online with the Tierra del Fuego National Park – even though this trail isn’t inside the park’s main gate. It’s quick and free. Just head to the official trekking registry and log your dates and route.
Park staff do check this data, and it’s used for search and rescue efforts if anything goes wrong. Don’t skip it.
Water on the Trail
No need to carry two days’ worth – there’s a stream right by the campsite that flows well all season. I still recommend starting Day 1 with at least 1.5–2L, especially if it’s sunny or windy (aka always). We also carry our lifestraw on all hikes, it’s a game changer
Camping at the Lagoon
The campsite at Laguna del Caminante is rugged but beautiful – and surprisingly quiet. Of the four designated camps in the area, this is the one that never feels overrun. There are no toilets or shelters, just a few flat spots by the water and windbreaks made from stones.
Didn’t bring your own gear? Don’t worry – renting a tent and stove in Ushuaia is cheap and easy, and most outfitters are used to prepping people for this trek.
Signal, Maps, and Safety
- Cell service: You’ll lose signal early, and won’t get it back until you’re almost back in town. There’s patchy reception in the first hour, but after that, consider yourself offline.
- Maps: Before heading out, download an offline route from AllTrails. I found it accurate.
- Trail marking: The trail is clearly marked the entire way, with painted posts and cairns across all terrain types.
- Emergencies: There’s no official patrol, but hikers do this route regularly in summer. If you’re hiking solo, check in with your hostel or a local agency and let them know your plan.
⛺️ I’ve put together my full backpacking gear list here if you want to see everything I carry. You can also browse it all in my Amazon storefront.
Laguna del Caminante’s trail contrasts between challenging ascents and serene wilderness, perfectly capturing the wild spirit of Patagonia. Whether it’s the challenging ascents, the muddy forests, or the peaceful lagoon, this trek encapsulates the spirit of adventure that draws many to the wilds of Argentina. It was my first introduction to Patagonia, a region I would fall in love with over the next two months.
Where To Stay In Ushuaia
Ushuaia has something for every budget – just book early in summer, especially if penguin season overlaps with cruise season.
Luxury | Arakur Resort & Spa. Worth the splurge for the views, the spa, and the peace. I stayed here for five days, the hot tubs with the views alone are worth the price.
Mid-range | Southern Suits B8. Central, comfy, and within walking distance of pretty much everything.
Budget | Selknam. Friendly, simple, and great for travelers who’d rather spend on crab than bedding.
If you’re into glacier views but want something high-altitude without committing to a full summit, the Confluencia hike near Aconcagua might just be your next adventure.
Other Hikes in Ushuaia (Tierra del Fuego)
If you’re looking for more adventure beyond Laguna del Caminante, Tierra del Fuego offers plenty of hiking trails that showcase the region’s diverse landscapes. Here are four hikes worth considering:
- Vinciguerra Glacier and Laguna de los Témpanos
Distance: 14 km round trip
Difficulty: Difficult
This trail takes you through lush forests before reaching the Vinciguerra Glacier. The final reward is the stunning Laguna de los Témpanos, a glacier-fed lagoon surrounded by ice. - Senda Costera (Coastal Path)
Distance: 8 km one way
Difficulty: Moderate
This coastal hike within Tierra del Fuego National Park offers breathtaking views of the Beagle Channel. It’s perfect for spotting seabirds and enjoying the region’s coastal beauty. - Cerro Guanaco
Distance: 8 km round trip
Difficulty: Strenuous
Known for its panoramic views, this hike is a tough ascent but rewards you with a stunning vista over the Beagle Channel and the surrounding peaks. - Laguna Esmeralda
Distance: 10 km round trip
Difficulty: Easy to Moderate
A popular and relatively easy trail, Laguna Esmeralda leads you through forests and peat bogs to a stunning emerald-green lake. It’s a great option for those looking for a half-day hike.
If you’re building out your time in Patagonia, these hikes pair perfectly with a flexible Argentina itinerary that covers the best of the south.
Torn between hiking here or heading north? I compared the experience of Patagonia’s two most popular hubs in this El Calafate vs El Chaltén breakdown.
